In the world of motorcycle maintenance, one crucial task that every Harley-Davidson owner should be well-versed in is the oil change. Regular oil changes are essential to ensure the longevity and optimal performance of your beloved Harley. In this comprehensive guide, we will walk you through the step-by-step process of performing a Harley oil change, ensuring your ride remains as smooth as ever.
Understanding the Importance of an Oil Change
Why Is It Necessary?
Before diving into the nitty-gritty of changing your Harley’s oil, it’s crucial to understand why it’s necessary in the first place. Motor oil plays a vital role in lubricating the engine’s moving parts, reducing friction, cooling the engine, and cleaning it from harmful debris and contaminants. Over time, oil breaks down, loses its viscosity, and accumulates dirt, which can lead to engine wear and decreased performance.
Gather Your Tools and Materials
What You’ll Need
Let’s start by gathering all the tools and materials required for this task. Here’s a checklist:
- Motorcycle Jack or Lift: You’ll need this to elevate your bike for easy access.
- Oil Drain Pan: To collect the old oil for proper disposal.
- Socket Set: To remove the drain plug and oil filter.
- Oil Filter Wrench: Essential for removing the oil filter.
- Funnel: For pouring new oil into the engine.
- New Oil Filter: Make sure it’s the right one for your Harley model.
- Fresh Motor Oil: Consult your owner’s manual for the recommended type and quantity.
- Oil Filter Gasket: Usually comes with the new oil filter.
- Oil Filter Drain Pan: To catch any residual oil from the filter.
Preparing Your Harley
Safely Jacking Up Your Bike
Safety should always be your top priority. Use a motorcycle jack or lift to elevate your Harley, ensuring it’s stable and won’t tip over during the oil change process. Follow your owner’s manual for specific instructions on where to place the jack.
Draining the Old Oil
Removing the Drain Plug
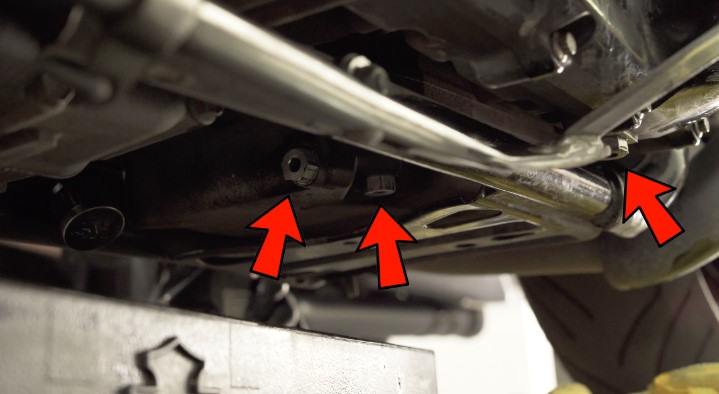
With your Harley securely elevated, locate the oil drain plug underneath the engine. Using the socket set, carefully remove the drain plug and allow the old oil to flow into the oil drain pan. Be cautious as the oil might still be hot.
Changing the Oil Filter
While the old oil is draining, remove the old oil filter using the oil filter wrench. Make sure to have the oil filter drain pan handy to catch any oil that drips from it.
Installing the New Oil Filter
Preparing the New Filter
Before attaching the new oil filter, lubricate the rubber gasket on the top with a small amount of fresh oil. This ensures a tight seal and easy removal during the next oil change.
Installing the New Filter
Screw on the new oil filter by hand until it’s snug. Then, use the oil filter wrench to tighten it another quarter turn. This ensures a proper seal without over-tightening.
Adding Fresh Oil
Refilling the Engine
Now it’s time to replenish your Harley’s engine with fresh oil. Consult your owner’s manual for the recommended oil type and quantity. Use a funnel to pour the oil into the oil filler neck.
Checking the Oil Level
After adding the oil, start your Harley and let it run for a minute or two. Then, turn it off and check the oil level using the dipstick. Adjust the oil level as needed.
Wrapping It Up
Replacing the Drain Plug
Once you’re satisfied with the oil level, reattach the drain plug using your socket set. Make sure it’s securely tightened to prevent any leaks.
Recycling Old Oil
Dispose of the old oil and oil filter properly. Many auto parts stores or recycling centers accept used motor oil.
Conclusion
Performing a Harley oil change is an essential maintenance task that every rider should be comfortable with. Regular oil changes keep your engine running smoothly, ensuring a long and enjoyable life for your Harley-Davidson motorcycle.
